
Sterilight UV Lamp Replacement: Steps, Specs and Safety
The controller is asking for a new lamp, but the system still appears to be working. Water is flowing, the indicator is lit, and you're wondering whether a Sterilight UV lamp replacement can wait until the bulb fails.
Visible light isn't proof of disinfection. The useful maintenance checks are the lamp's operating history, its compatibility with the reactor, the condition of the quartz sleeve, and the system's verified output. A careful replacement addresses all of those, not just whether the new lamp switches on.
Table of Contents
- Replacement Intervals and Lamp Life at a Glance
- Matching the Replacement Lamp to Your Sterilight Unit
- How to Replace a Sterilight UV Lamp Step by Step
- Sleeve Cleaning and Output Checks After Installation
- Safe Disposal and Handling a Broken Lamp
- Confirm the Model and Order the Right Lamp
Replacement Intervals and Lamp Life at a Glance
Schedule the change for a continuously occupied home or facility. Do not wait for darkness or a controller alarm. UV-C output falls as the lamp ages while the tube still lights, so a glowing lamp is not proof of disinfection.
The VIQUA Sterilight manual specifies replacement after 9,000 operating hours, about 375 days of continuous operation, which makes annual replacement the practical standard. It permits biennial replacement for seasonal homes used only part of the year. For a system that runs year round, set the interval from installation date and actual hours. Do not extend it.
Replacement intervals and lamp-life benchmarks by use case
| Use case or reference | Operating hours | Replacement interval | Source |
|---|---|---|---|
| Continuous 24/7 operation | 9,000 hours | About 375 days, practically annual | VIQUA manual |
| Seasonal home, part-year use | 9,000 hours | Biennial replacement permitted | VIQUA manual |
| Rated life, model-specific | 9,000 to 12,000 hours | Follow the exact model rating | AMPAC Water Systems 2025 lamp listings |
| Low-pressure UV-C typical life | 9,000 to 10,000 continuous hours | Roughly one year of continuous operation | Typical manufacturer rating range |
| Continuous-use planning year | About 8,760 hours in a full year | Plan on annual replacement | Typical sizing allowance |
| Output-decline trigger | Noticeable measured loss of UV output | Investigate and replace when measured low | Field output check |
The broader ranges describe common lamp ratings. They do not extend your Sterilight rating. Use the operating instructions for your specific reactor, and treat measured loss as a reason to investigate sooner. I recommend logging hours against the 9,000 hour limit rather than estimating from the calendar.
VIQUA's system-maintenance guidance describes annual lamp replacement for continuous-use applications and a one-year limited warranty for lamps, sleeves, and sensors from purchase. Track warranty from the receipt. Track service life from installation and runtime.
Practical rule: Write the installation date on the maintenance record before you discard the replacement carton.
Keep lamp changes alongside upstream filter service rather than maintaining separate reminders nobody checks. SouthRay Kitchen & Bath's filter maintenance guide is a useful companion when organizing the filtration side of that routine. Record the installation date and available runtime now, then assign a named person to the next replacement.
Matching the Replacement Lamp to Your Sterilight Unit
You open the controller and the chamber label reads one Sterilight model while the lamp inside carries a part number from a different series. Stop there. That mismatch usually means a previous owner installed whatever fit the socket, and ordering the same lamp repeats the error.
Start from the reactor, not the lamp. Photograph the stainless-steel chamber label, then compare it against the replacement listed in the manual for that exact model. Wattage and socket style narrow the field, but the EPA drinking-water UV guidance lists arc length, envelope material and dimensions, mercury quantity, and spectral output as replacement-lamp characteristics that affect performance. A lamp can seat and light while delivering the wrong dose geometry for the chamber.
Compatibility checks before ordering a replacement lamp
| Check | Where to find it | Why it matters |
|---|---|---|
| Reactor model number | Stainless-steel chamber label | Replacement lamps are matched to the model |
| Lamp part number | Existing lamp label or manual | Identifies the specified replacement |
| Arc length and dimensions | Original lamp specification sheet | Establishes physical fit and output geometry |
| Envelope material and mercury quantity | Manufacturer or validated lamp datasheet | Affects UV output and mercury handling |
| Spectral output | Lamp datasheet | Establishes germicidal wavelength performance |
| Connector and wattage | Unit specification or ballast label | Checks electrical compatibility, not disinfection performance |
Use the identification sequence below before comparing seller descriptions.
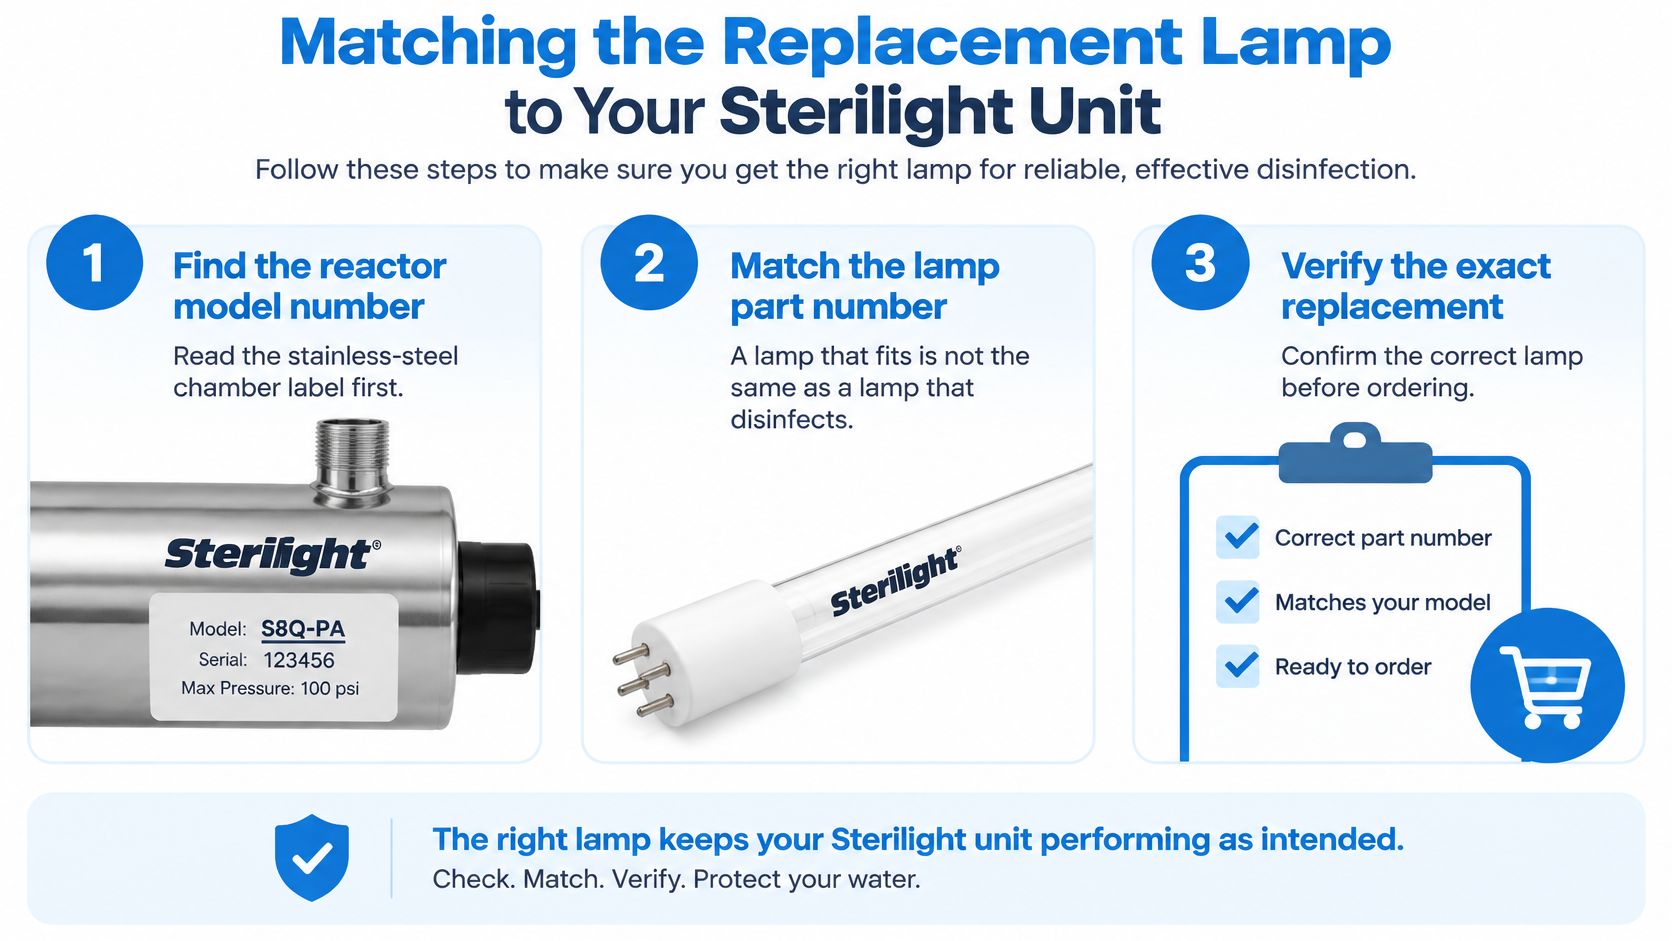
Separate approved replacements from look-alikes
I recommend treating validated compatibility as the purchase standard. A genuine replacement names the manufacturer and the reactor models it serves. An approved alternative carries documented suitability for that reactor in its datasheet.
That paperwork matters because blue glow tells you nothing about germicidal output. Without a UV sensor or monitor, a low-output look-alike runs for months while under-dosing the water. Paying less upfront buys uncertainty you cannot see at the tap.
Keep other equipment records separate, too. A listing such as Living Water II identifies a different product, and that listing cannot establish interchangeability with a Sterilight reactor.
Before paying, answer these questions:
- Model confirmation: Does the replacement documentation name your reactor?
- Part confirmation: Does the specified lamp agree with the manufacturer's replacement information?
- Performance confirmation: Can the installed system's output be checked through its approved monitor or a qualified service procedure?
If the label is unreadable or the documentation conflicts, obtain manufacturer or qualified water-treatment confirmation rather than guessing.
How to Replace a Sterilight UV Lamp Step by Step
Prepare a clear work surface, the correct lamp, the model-specific manual, clean handling gloves, protective eyewear, and a rigid container for the removed lamp. Keep an alternative drinking-water supply available while treatment is unavailable, and don't leave an untreated bypass supplying drinking fixtures.
ASHRAE's ultraviolet safety guidance recommends lockout/tagout, protective eyewear, and puncture-resistant gloves because UV exposure can injure eyes and skin and quartz lamps can break. Clean nitrile or latex gloves help prevent fingerprints during installation, but they aren't puncture protection.
Shutdown and removal
Confirm the exact replacement before opening the unit. Put the lamp carton beside the model-specific manual and check the identification against the chamber label. Keep the instructions open because connector releases, retaining hardware, and reset procedures differ between controllers.
Isolate electrical power at its source. Disconnect the unit and lock out the supply where applicable so another person can't energize it during servicing. Don't rely on a dark display as proof of isolation, and don't open hardwired electrical equipment unless you're qualified.
Stop water flow and release pressure. Close the appropriate isolation valves, relieve pressure through the designated outlet or drain, and drain the chamber as the manual directs. Place a tray beneath the service area so residual water doesn't reach the connector or controller.
Allow the lamp and chamber to cool fully. Don't grip hot quartz or attempt to speed cooling with cold water. Use the cooling period to lay out the retaining components in removal order and inspect the new carton for damage.
Release the connector by its housing. Remove the protective cap or plug using the specified release, then pull on the connector body rather than its wires. If it resists, check for a latch or retainer instead of twisting or forcing it.
Withdraw the old lamp straight out. Support it by its ends and keep it aligned with the opening to avoid striking the quartz sleeve. Leave the sleeve installed during extraction, but pause for inspection and the cleaning procedure if you find fouling or damage.
The illustrated sequence is a reminder, not a substitute for your unit's manual.
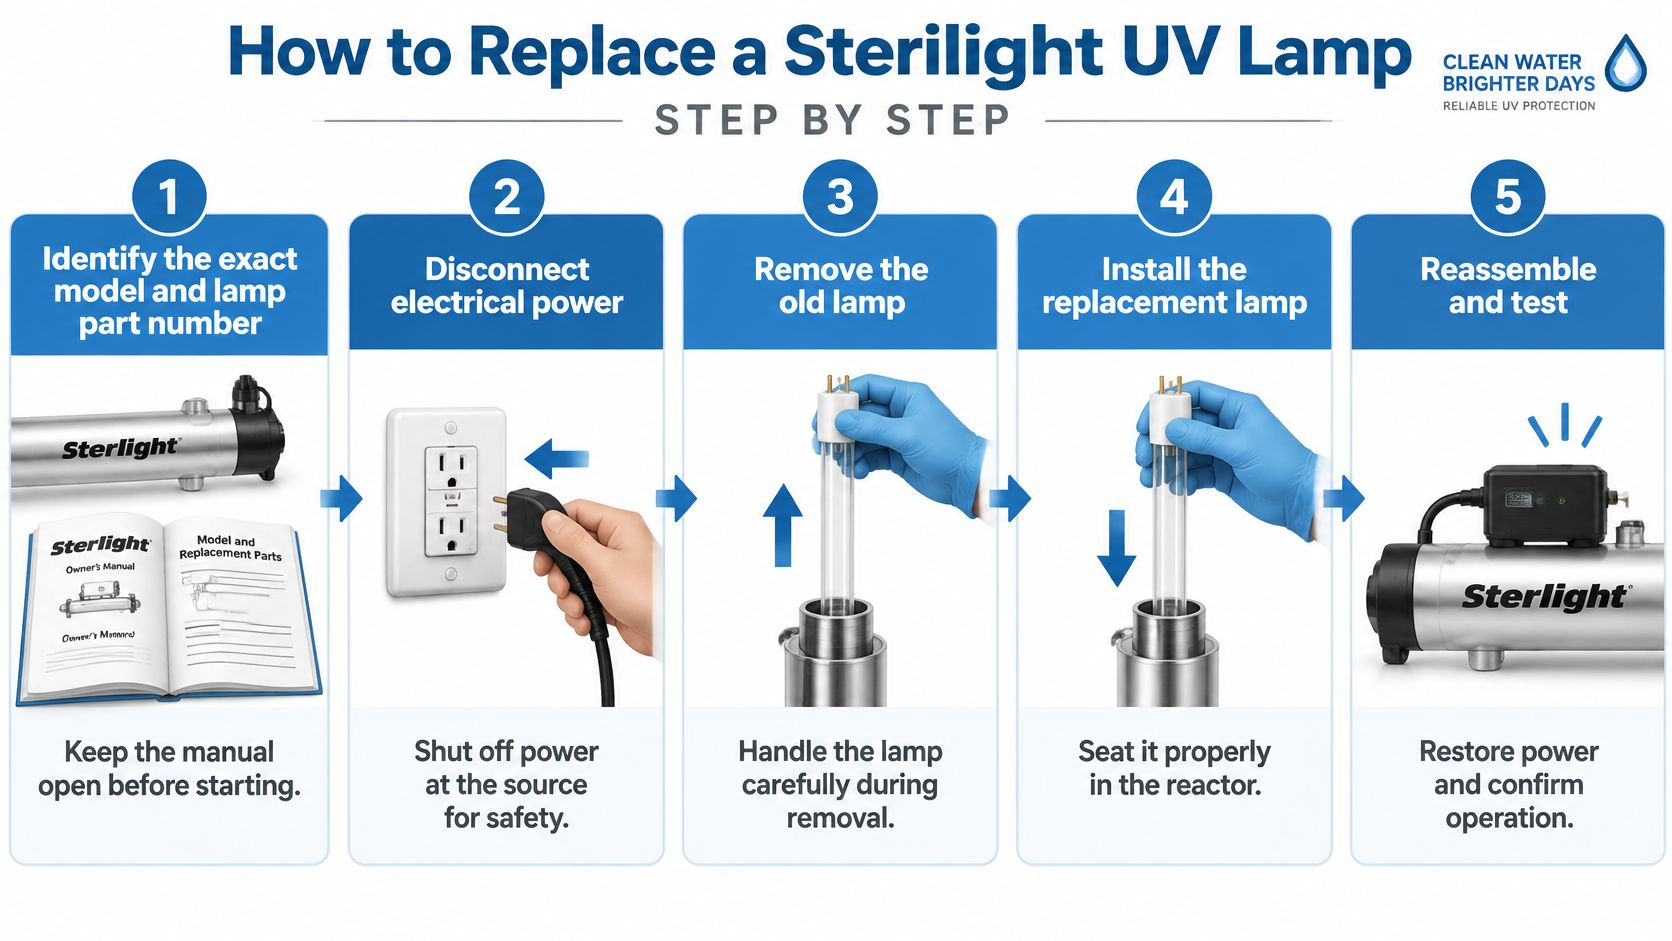
Installation and reassembly
Fit the new lamp without touching its glass. Use clean handling gloves and support the lamp by its ceramic ends because fingerprints can impair UV transmission. If cleaning is needed, wipe the glass with isopropyl alcohol and a lint-free cloth, then let it dry before insertion.
Check every disturbed seal and connection before restart. Inspect O-rings, seat the retaining hardware, reconnect the lamp fully, and close the protective housing without overtightening quartz-related fittings. Restore pressure and power in the manufacturer's sequence, keeping electrical connections dry and checking the status indicator.
When organizing service materials, keep Living Water replacement parts records separate from the Sterilight parts list so similarly described components don't get mixed together.
A mechanically complete installation has a properly seated lamp, secure connector, intact protective housing, and no leakage. The controller should be ready for its model-specific timer reset and performance checks before the water supply returns to normal use.
Sleeve Cleaning and Output Checks After Installation
A system that runs with a glowing lamp can still deliver low UV dose when the quartz sleeve is scaled or the sensor reads high while output has fallen. Start with sleeve condition, then confirm lamp and ballast pairing, operating temperature, and sensor condition before you judge the new lamp.
Inspect the quartz for mineral scale, cloudy patches, and biofilm before closing the assembly. Use a flashlight to examine the full length rather than assuming clear-looking ends mean the sleeve is clean. The sleeve should look uniformly clear, without cracks or persistent deposits.
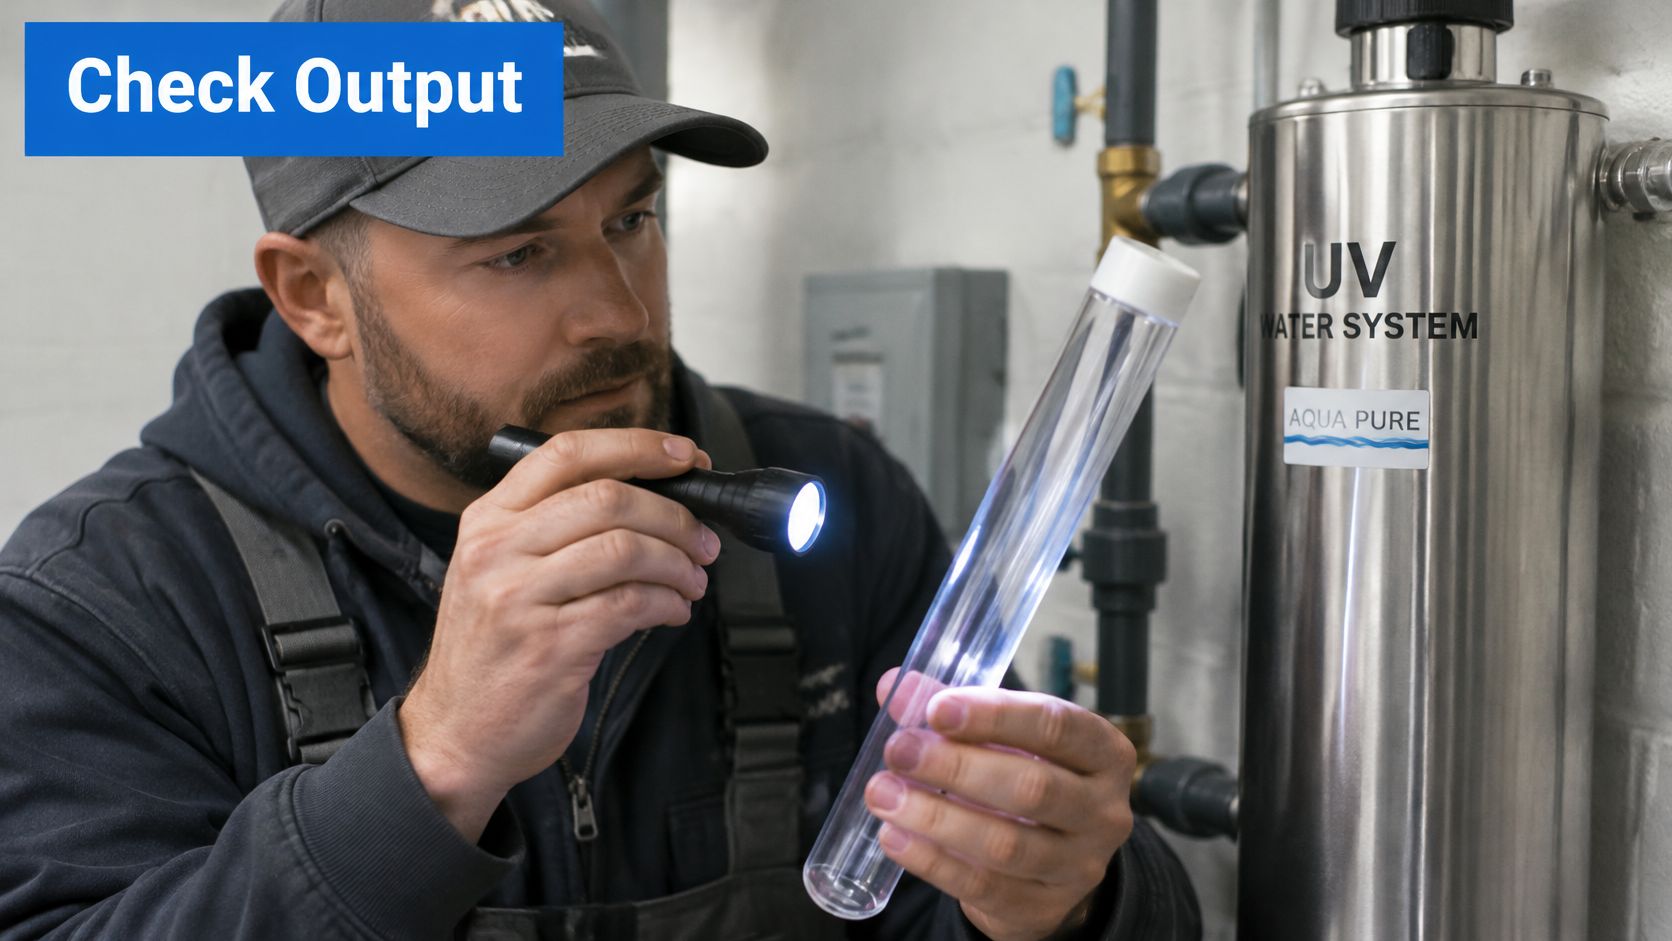
Remove and clean a fouled sleeve using only the cleaner permitted by the unit manual, then rinse it thoroughly. Do not scrape it with metal tools or use abrasive pads. Replace quartz that remains opaque or shows damage, since a new lamp cannot correct an opaque sleeve.
Verify operation without confusing irradiance with dose
Use the controller actual reset sequence and confirm that the replacement alarm clears. Restore pressure carefully, examine the gland nut and O-ring locations for moisture, and test the flow interlock if your system has one.
MSF's UVGI guidance provides broader technical benchmarks, including replacement at 30% output loss, although its application is upper-room air treatment, not a Sterilight drinking-water validation procedure. Calibrated checks at commissioning and every six to twelve months as described in MSF's UVGI guidance give a maintenance reference point, with monthly inspection in demanding environments, while the reactor manufacturer monitoring method governs this installation.
Do not open a powered reactor to take a handheld reading. Use the installed sensor or a qualified technician approved measurement arrangement. Irradiance alone does not establish delivered drinking-water dose without the reactor operating conditions.
Watch the video for lamp seating, connector engagement, and housing closure, then follow the model-specific instructions for timer reset and leak checks.
Troubleshoot low output in order
- Sleeve condition: Correct deposits or opacity first.
- Lamp and ballast pairing: Check the specified lamp, connector, and electrical rating.
- Operating temperature: Confirm conditions are within the unit permitted range.
- Sensor condition: Check cleanliness and calibration through the approved service procedure.
Don't keep buying lamps to solve a sleeve, ballast, or sensor fault.
Log the installation date, runtime, sleeve condition, available output reading, and test date. Runtime hours decide the next change, not visible glow. If the remaining complaint is smell, use WhatsDemand's guide to water odors to investigate that separately rather than treating odor as a UV performance test.
Safe Disposal and Handling a Broken Lamp
Treat the removed lamp as mercury-containing waste, not ordinary household glass. Put an intact lamp in its protective carton or another rigid, closed container, label it, and arrange an appropriate mercury-recycling or hazardous-waste drop-off under local rules.
The Sterilight S-Series owner's manual emphasizes electrical isolation, cooling, and keeping the lamp enclosed during operation. Never energize the lamp outside the chamber, even briefly to see whether it works.
Respond to breakage without spreading contamination
Stop work and restrict access. Keep people and pets away, maintain electrical isolation, and prevent use of the affected water supply.
Ventilate the room. Open an exterior window where practical and avoid circulating air from the spill area into occupied rooms.
Don't sweep or use a household vacuum. Either can spread fragments and contamination; don't pour chamber water into a drain if it may contain lamp debris.
Collect accessible fragments carefully. For a small, accessible surface break, use stiff cardboard and sticky tape while wearing suitable gloves. Don't reach into a chamber full of broken quartz.
Contain cleanup materials. Place fragments, tape, and wipes in a sealable container, then use rigid outer packaging to protect against punctures.
Get disposal and return-to-service instructions. Contact the local hazardous-waste authority, and involve a qualified water-treatment technician if breakage occurred inside the reactor.
An intact lamp inside a broken sleeve and a shattered mercury-containing lamp aren't the same incident. Tell the technician exactly what broke and whether water contacted the debris.
A cracked or nicked quartz sleeve belongs in the replacement pile, not back under pressure.
Document the cleanup, affected water, replacement components, and chamber inspection before restarting. Add the recycling facility's name to the maintenance record so the next person doesn't have to discover the disposal route during a breakdown.
Confirm the Model and Order the Right Lamp
Make the documented part-number match the buying decision, then compare prices. The historical listings below illustrate why searching only for a Sterilight replacement bulb can return different components with different prices.
Listed Sterilight replacement lamps and prices
| Lamp model | Listed price | Listed lamp life | Source |
|---|---|---|---|
| Sterilight S410RL-HO | $164.44 on sale | 1 year or 9,000 hours | US Water Systems, 2025 listing |
| Sterilight S463RL | $140.00 before discount | 1 year or 9,000 hours | US Water Systems, 2025 parts listing |
| Sterilight S200RL-HO | $135.00 | 12 months | Home Water Purifiers and Filters, 2025 listing |
These are dated price snapshots, not current quotations or evidence that any listed lamp suits your reactor. Compare the replacement documentation with the original specification, including the lamp geometry and output characteristics, before considering the saving.
Accessories need their own compatibility check. A product such as the Ring Hot Water UV tap adapter shouldn't be assumed suitable for a Sterilight controller because both products mention UV.
Keep the purchasing record useful
Save a chamber-label photograph, the approved replacement reference, the invoice, and the completed service record together. Keep separate product documentation, such as the Living Water III listing, out of the Sterilight service file unless you're recording distinct equipment.
Our replacement parts have a 90-day warranty. That policy doesn't establish Sterilight compatibility or replace the reactor manufacturer's maintenance requirements.
After installation, record the confirmed part, timer reset, leak check, and available output verification. Set the next reminder from the unit's prescribed service interval, not from the day you happen to notice another alarm.
EcoQuest Purifiers offers replacement parts including UV lamps, RCI cells, ozone plates, filters, screens, and HEPA filters. Visit EcoQuest Purifiers with your equipment model and existing part number ready, and verify the listed application before ordering a replacement.