
UV Air Purifier for Furnace Install and Maintenance Guide
You change the furnace filter, vacuum the registers, and still notice a musty odor when the blower starts. Dust may settle on nearby furniture, while the air from the vents feels no cleaner than before. In many homes, the missing piece isn't another filter. It's a dirty or biologically fouled coil inside the HVAC cabinet.
A UV air purifier for furnace systems can help, but its most useful job is often misunderstood. Installed correctly, UV-C can control microbial growth on the indoor coil and help preserve airflow through that coil. It can also reduce biological contaminants under suitable exposure conditions. It doesn't replace a particle filter, remove all dust, or correct a wet coil, blocked return, leaking duct, or excessive indoor humidity.
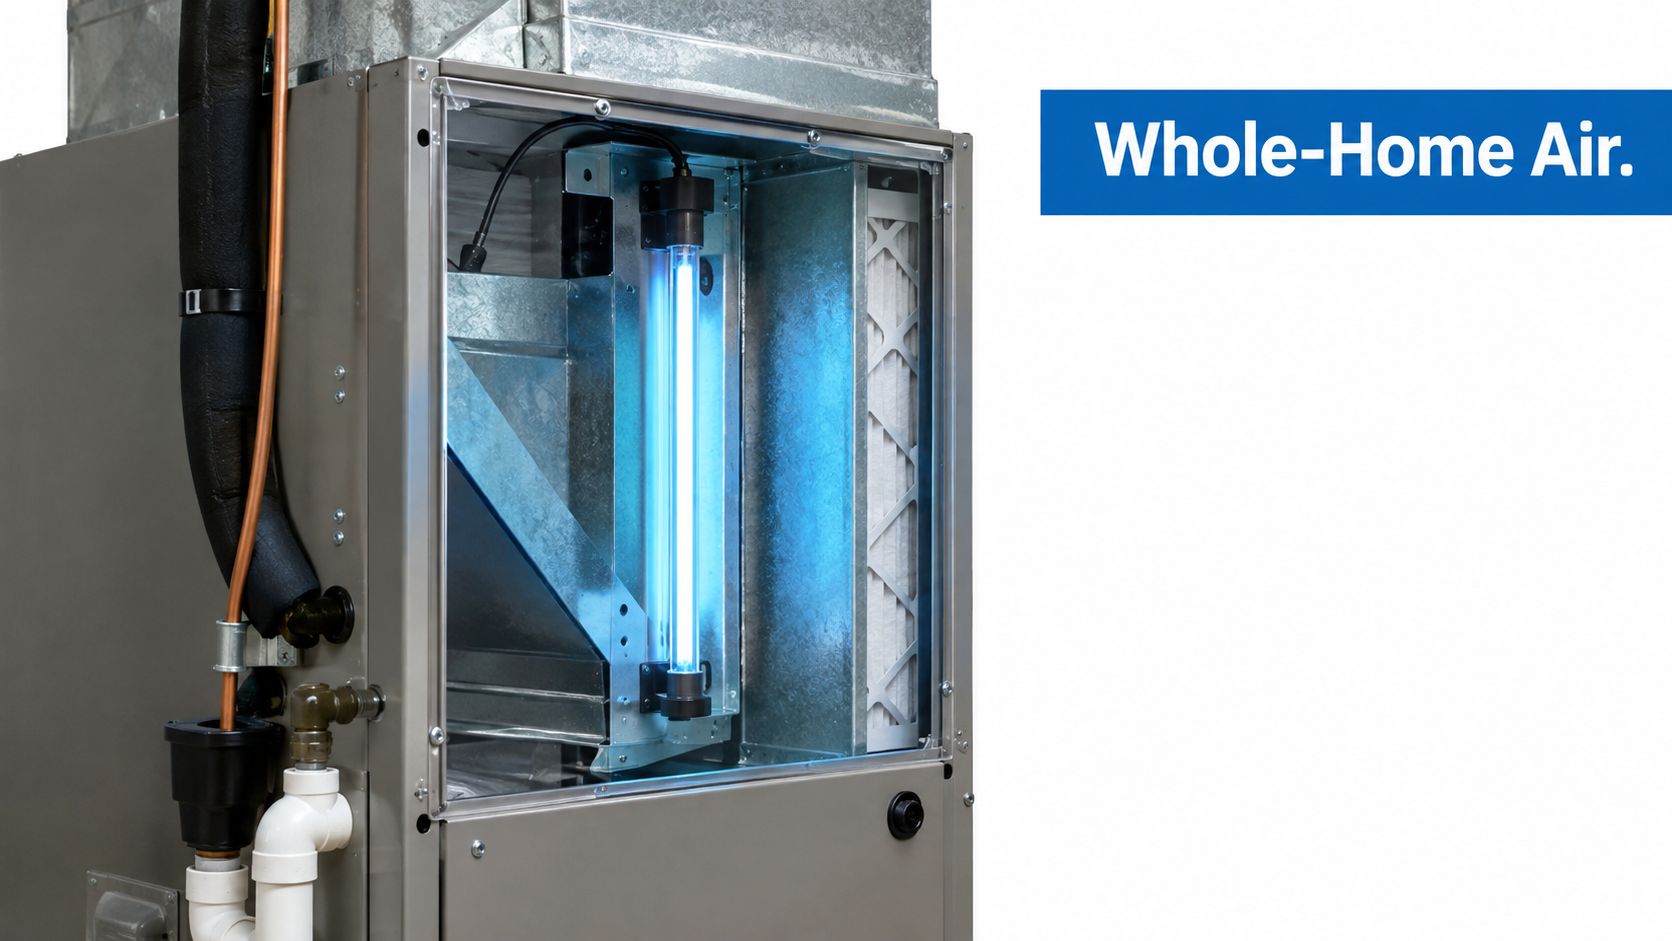
Table of Contents
- Introduction to UV Air Purifiers for Furnace Systems
- How to Choose the Right UV System for Your Furnace
- Placement Wiring and Safety Essentials Before Installation
- Integrating and Maintaining Your Furnace UV Purifier
- Troubleshooting Common Furnace UV Issues
- Final Tips for Cleaner Air and Next Steps
Introduction to UV Air Purifiers for Furnace Systems
What furnace UV actually treats
A portable purifier cleans air in the room where it sits. A better HVAC filter captures particles as air passes through the return system. A furnace-mounted UV unit uses ultraviolet energy inside the equipment, usually near the indoor coil or blower section, to treat surfaces and, depending on the design and exposure time, the airstream.
That distinction matters. A coil-mounted lamp has a direct line of sight to the coil face and works primarily as a coil hygiene and airflow-support device. An airstream system aims to expose moving air to UV-C, but airflow speed, lamp output, distance, and contact time determine whether that approach performs meaningfully. A lamp glowing inside a duct isn't automatically a sterilizer.
Field evidence supports the coil-maintenance angle. In a 10-month laboratory-building comparison, a coil irradiation system increased coil overall enthalpy-based thermal conductance by 10%, reduced pressure drop by 13%, and cut fan energy use by 9%. The same study reported fan-energy savings 39% greater than UV lamp energy use, implying net operating savings in that installation. The published field comparison is useful because it measured equipment performance, not just lamp operation.
Practical rule: If your main complaint is dust, UV isn't the first tool to buy. If the coil is dirty, damp, or producing a recurring biological odor, inspect and clean the HVAC equipment before choosing the lamp.
What it won't do
UV light doesn't physically capture dust, pollen, pet dander, or smoke particles. The filter still handles that job. It also won't remove a source of moisture, clean an already fouled coil by magic, or make an undersized HVAC system perform like a larger one.
Office-building evidence shows why the technology still deserves consideration. One evaluation associated HVAC UVGI with a 99% reduction in microbial and endotoxin concentrations on irradiated cooling coils and drip pans, with significantly fewer building-related respiratory and mucosal symptoms among 771 participating office workers. The Health Design study summary provides that context, but residential results will vary with installation quality and operating conditions.
For a broader view of managing biological contaminants in occupied buildings, the resource on contaminant control in schools is useful. Schools and homes don't have identical HVAC layouts, but both benefit from treating filtration, moisture, equipment cleanliness, and ventilation as connected issues.
A sensible decision flow is simple:
- Inspect the coil, blower, drain pan, filter, and return path.
- Decide whether the goal is coil hygiene, odor control, airstream treatment, or particle capture.
- Confirm lamp placement, electrical access, UV-safe materials, and service clearance.
- Verify irradiance at the coil face rather than judging performance by visible brightness.
- Pair UV with filtration and moisture control where the complaint involves particles or humidity.
How to Choose the Right UV System for Your Furnace
The right system begins with the furnace cabinet, not the product box. Confirm whether the equipment has an accessible indoor coil, how wide the cabinet is, where the blower sits, and whether the lamp can illuminate the intended surface without contacting fins or duct walls. A contractor should also check the available power connection, service access, and the materials exposed to UV.
Compare the main system approaches
Standard UV-C systems are generally suited to straightforward coil irradiation where space is limited and the target is clear. Higher-output systems make more sense when the coil face is larger or the lamp must sit farther away. Combination systems add another treatment stage, such as carbon, for odor concerns, but they still need correct UV placement.
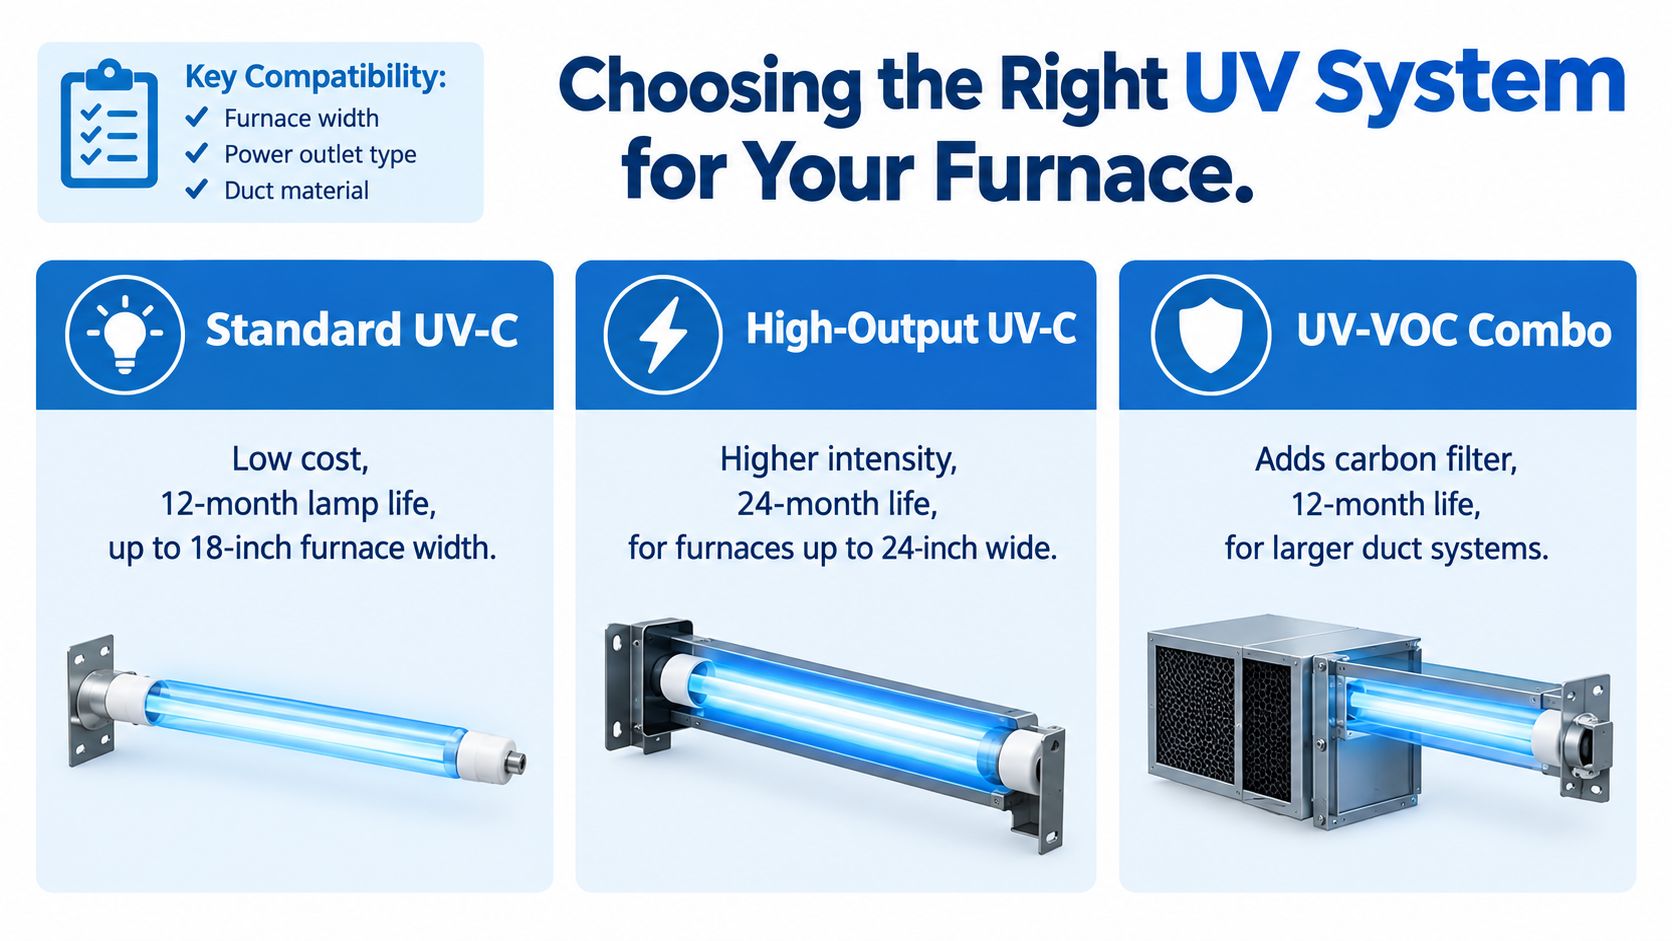
| System Type | Best For | Furnace Compatibility | Maintenance Need |
|---|---|---|---|
| Standard UV-C | Coil hygiene in a compact cabinet | A clear coil face and suitable lamp clearance | Inspect lamp and clean the glass on the service schedule |
| High-Output UV-C | Larger coils or greater installation distance | Adequate cabinet depth, power, and UV-resistant materials | Verify output with a meter and follow lamp replacement guidance |
| UV-VOC Combo | UV treatment plus odor-focused media | Larger duct or air-handler layouts with room for the added stage | Replace or inspect both the lamp and carbon component |
The comparison table is a selection aid, not a substitute for an irradiance measurement. ASHRAE-linked field work found that a coil-face UV-C energy field of at least 1,000 µW/cm² supported biofilm disinfection and improved airflow performance, while 50 to 100 µW/cm² wasn't effective for removing biofilm embedded within coil fins. The ASHRAE technical document makes the practical point clear: lamp intensity at the target matters more than the advertised wattage alone.
Match the system to the complaint
Choose coil irradiation when the inspection finds biological buildup on a cooling coil or drip pan. Choose an airstream design only when the unit provides a realistic exposure path and the installer can confirm that the airflow and lamp geometry support the intended treatment. Choose a filter upgrade when visible dust and allergens are the primary concern.
A combination setup may be appropriate when odors persist after source removal and coil cleaning, but don't assume a carbon stage fixes a drain problem or hidden moisture. If the concern is limited to a bathroom, closet, kitchen, pantry, garage, or another small space, the Air Ionizer Purifier EcoSpace is a separate room-oriented option with a stated coverage area of 1 to 15 m² and adjustable ozone output from 0 to 100 mg/hour. It isn't a substitute for furnace coil treatment.
For homeowners comparing HVAC-integrated equipment, the HVAC air purifier catalog can help identify the type of equipment and replacement ecosystem involved. Check the manual, confirm ozone-related safety information, and ask for a measured installation plan before paying for a system that merely fits the cabinet.
Placement Wiring and Safety Essentials Before Installation
Installation quality determines whether a UV lamp protects the coil or illuminates an empty section of sheet metal. I start at the coil and work outward. The target surface must be visible from the lamp, the lamp must remain serviceable, and no person should receive direct exposure when the access panel is open.
Establish the mounting position
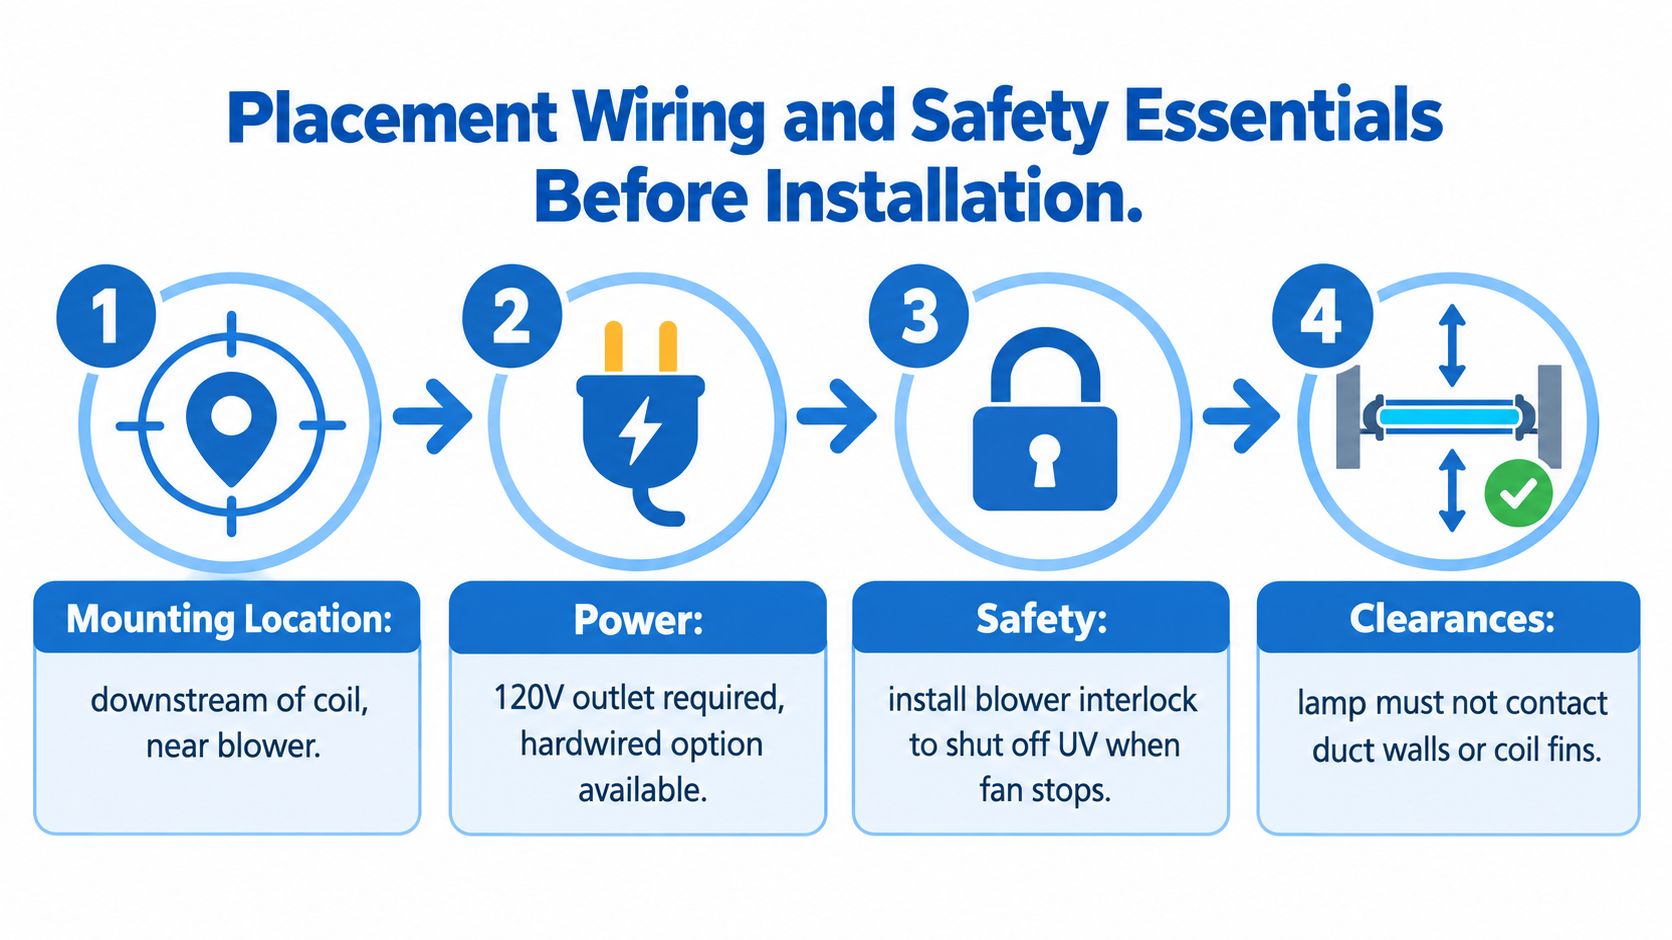
For coil control, mount the lamp where it has a direct view of the coil face, commonly downstream of the coil and near the blower section when the cabinet layout allows it. The exact position depends on airflow direction and the coil's location. A lamp aimed at the wrong side, blocked by a housing, or placed too far from the fins may produce little useful dose.
Don't install over a coil covered with established deposits and expect ultraviolet energy to remove them. Clean the coil first, then install the lamp so it can maintain the surface. The ASHRAE-linked work specifically notes that irradiating a fouled coil without cleaning can leave pre-existing deposits in place.
Protect nearby plastic, wiring insulation, drain components, and inspection windows from unnecessary exposure. Use materials rated for the environment, maintain the manufacturer's clearances, and ensure the lamp doesn't touch coil fins or duct walls. UV can degrade unsuitable plastics over time.
Complete the electrical and interlock work
The system needs a reliable power source, secure wiring, and a service shutoff. Follow the manufacturer's electrical instructions and local code. A blower interlock is a strong safety feature because it can shut off UV operation when the fan stops, reducing exposure risk during access or service.
Before energizing the lamp, confirm that the access panel is secure and that no reflective surface directs UV toward an opening. Label the equipment, document the lamp location, and leave room to remove the lamp without dismantling unrelated furnace components.
Safety check: Never look directly at an operating UV-C lamp or expose skin to it. Turn off power before opening the cabinet, and have a qualified HVAC technician handle wiring, interlocks, and code-sensitive work.
Verify the dose, not the glow
A visible blue glow only confirms that the lamp is operating. It doesn't confirm that the coil receives an effective energy field. Measure irradiance at the coil face with a suitable meter, record the reading, and compare it with the design target.
The field data is a warning against undersizing. In one hot, humid HVAC system, ASHRAE measurements found roughly 15% improvements in heat-transfer performance and flow resistance after UVGI treatment. Another Tampa field study reported a 21.65% to 21.7% reduction in mean coil airside pressure drop and a 14.5% to 14.8% increase in mean overall heat-transfer coefficient. ASHRAE's feature on the field measurements also emphasizes that performance depends heavily on conditions.
The installation can include other air-cleaning equipment, but each technology needs its own safety review. For example, the induct air scrubber belongs in a separate equipment decision, not as a reason to ignore lamp placement or coil access.
This short visual walkthrough can help you recognize the cabinet components before service, but it doesn't replace the furnace manual or a technician's electrical assessment.
An ozone component isn't interchangeable with a UV-C lamp. If you're servicing an existing compatible purifier, the Standard Ozone Plate is listed for models including Fresh Air, Fresh Air Double Plus, Classic, XL-15, XL-15C, XL-15S, Breeze, Breeze AT, Flair, 880, Ozone Blaster, Eagle 2500, Eagle 5000, and Salon Air. Use only the part specified for the actual model, and follow its safety instructions.
Integrating and Maintaining Your Furnace UV Purifier
Once the location and electrical plan are approved, the physical installation should be tidy enough that future service is straightforward. Mount the bracket squarely, secure it with the specified fasteners, and insert the lamp without touching the glass with bare fingers. Oils from skin can soil the surface and create a service problem, so use clean gloves or a lint-free cloth when the product instructions require it.
Route the wiring away from moving blower parts, hot surfaces, sharp cabinet edges, and condensate paths. Connect the blower interlock as designed, secure loose conductors, and seal the access opening with suitable aluminum tape or approved caulk. Sealing prevents air leakage and stops the installation from becoming an accidental bypass around the filter.
Commission the system while the cabinet is open
Before closing the equipment, check that the lamp is locked into its holder and that the indicator operates. Then close the access panel, restore power, and confirm that the interlock behaves as intended. A lamp that runs with the blower off may indicate a wiring or control issue that needs correction before the unit is left in service.
Record the installation date, lamp model, mounting position, and initial irradiance reading. Also note the filter type, coil condition, and any odor or airflow complaint. That record gives the next technician a baseline instead of forcing them to guess what changed.
A clean lamp surface matters. Dust on the glass blocks useful output even when the lamp still looks bright, so include lamp inspection in routine HVAC service. Broader household practices matter too, and this overview of indoor air quality benefits is a helpful reminder that HVAC treatment works alongside source control and regular cleaning.
Use a calendar, not memory
Many residential installations use a 12-month lamp replacement interval, while some products specify a different schedule. Follow the lamp manufacturer's instructions, because operating hours and output decline aren't always visible. If the unit has an hour counter or service indicator, log it; otherwise, write the replacement date on the cabinet and in the homeowner's maintenance record.
A practical routine looks like this:
- At filter service: Check the indicator, inspect for dust on the lamp, and look for loose wiring or unusual discoloration.
- At seasonal HVAC service: Inspect the coil, drain pan, blower area, access seal, and lamp position. Clean the coil if deposits are present.
- At lamp replacement: Turn off power, allow the lamp to cool, use the correct replacement, reset any service indicator, and confirm interlock operation.
- After service: Compare airflow, odor recurrence, and coil condition with the original notes rather than relying on the lamp's appearance.
Replacement parts should match the installed purifier. The RCI cells and UV lamps catalog is relevant when the equipment uses those components, but confirm the model and part specification before ordering. RCI cells and UV lamps aren't interchangeable, and a mismatched part can leave the system operating without delivering the intended treatment.
Troubleshooting Common Furnace UV Issues
A furnace UV system usually reveals its problems through a change in the HVAC complaint, not through an obvious alarm. Start with the symptom, then inspect the simplest failure point before replacing parts.
The musty odor returns
A returning odor may mean the coil or drain pan still has deposits, the lamp has aged, or the lamp doesn't illuminate the contaminated surface. Turn off power, inspect the coil and pan, and look for a blocked drain or standing moisture. If the equipment remains dirty, clean the affected components first. If they are clean, check lamp age, mounting angle, and irradiance at the coil face.
A lamp that glows but measures weakly can be underpowered, too distant, obstructed, or past its service interval. Don't solve a dose problem by adding another lamp without checking the geometry.
The lamp doesn't illuminate
Check the service switch, fuse or breaker status, connector seating, indicator, and interlock operation. A blower interlock can prevent the lamp from running when the control circuit doesn't detect the expected fan condition. Never bypass that safety function just to make the lamp turn on.
If the lamp is within its service life and the power supply is correct, the ballast or control module may have failed. Cabinet wiring and energized testing belong with an HVAC professional.
The breaker trips
A repeated trip isn't a nuisance to reset. Disconnect power and stop operating the UV system until a qualified technician checks for damaged wiring, moisture intrusion, a failing ballast, or an incompatible power connection. The lamp itself may not be the cause.
Dust still appears on furniture
UV doesn't capture airborne particles. Check that the filter fits tightly, the filter is installed in the correct direction, and the return cabinet doesn't leak around the filter rack. If dust remains a major issue, evaluate a higher-efficiency filtration stage only after confirming that the furnace can handle its airflow resistance.
Diagnostic distinction: UV treats microorganisms and biological growth. Filtration captures particles. Carbon or other odor-focused media addresses a different contaminant category.
Plastic near the lamp discolors
Yellowing, brittleness, or warping suggests excessive exposure, unsuitable material, heat, or a clearance problem. Shut the system down and inspect the lamp orientation and surrounding components. Replace damaged material with a compatible part and correct the exposure path before restarting.
Call a professional for irradiance testing, cabinet modifications, interlock faults, breaker trips, damaged wiring, inaccessible coils, or any installation requiring live electrical diagnosis. A homeowner can often replace a lamp when the manual allows it, but power must be off and the replacement must match the system.
Final Tips for Cleaner Air and Next Steps
Treat a furnace UV purifier as one component in an indoor air plan, not as a universal cleaning device. The strongest use case is a compatible HVAC system with an accessible coil, recurring biological growth, moisture-related odor, or a need to protect coil cleanliness between service visits.
A reliable setup usually combines:
- Particle control: Use a correctly fitted filter that the furnace can move air through without excessive restriction.
- Moisture control: Correct condensate, drainage, leakage, and humidity problems instead of asking UV to compensate.
- Equipment care: Keep the coil, blower, drain pan, and return path clean.
- UV maintenance: Inspect the lamp, follow the replacement interval, and verify the coil-face dose when performance matters.
- Performance tracking: Note airflow complaints, odor recurrence, filter loading, and energy behavior after service.
The field results summarized earlier show why coil condition matters, but they don't guarantee identical gains in every house. Benefits can be much smaller in a dry heating season, in an already-clean system, or when the lamp is undersized or poorly positioned. A UV system also won't solve a source problem such as tobacco, a wet building material, a dirty return cavity, or a leaking duct.
If furnace integration isn't practical, start with the room where the complaint is strongest. A small-space product such as the Living Air Classic XL-15 can be considered for targeted odor control, while a portable purifier with particle filtration may be more appropriate for visible dust. Consult the equipment manuals and local electrical codes before modifying the furnace cabinet.
Use this go or no-go check:
- Go: The coil is accessible, the target is clear, the cabinet has service space, and the installer can verify irradiance.
- Pause: The complaint is mainly dust, the coil is already clean, or the system has unresolved moisture or airflow faults.
- Call for sizing help: The coil is large, the lamp must sit far away, the cabinet is crowded, or wiring and interlock work aren't familiar.
If those checks point toward installation, have the system sized around the coil face and installed for safe service, not selected by lamp brightness or marketing language.
EcoQuest Purifiers offers HVAC-integrated air-cleaning equipment, replacement UV lamps and RCI cells, ozone plates, and room-focused purification products for different indoor air concerns. Visit EcoQuest Purifiers to compare compatible equipment and replacement parts, then confirm sizing and installation requirements with your HVAC professional.